SIRSTUDIO · Snap Measure Toolkit documentation · sirstudiotools.com
Documentation / Snap Measure Toolkit
Snap Measure Toolkit documentation
Snap Measure Toolkit adds distances, paths, heights, text, speeds, angles, camera views and grids to your level. Every tool snaps to your meshes, shows a live label, and can appear in Play and in Movie Render Queue renders.

Before you start#
- You need Unreal Engine 5.8 on Windows.
- Open Edit > Plugins, search for Snap Measure Toolkit, tick it and restart the editor.
- A new button appears in the level editor toolbar. Section 1 starts there.
Sections 1 to 8 follow the tutorial video in the same order, and each section’s link opens the video where that part starts. The Reference at the end holds everything else. Click any picture to see it larger.
The tools are editor-only actors, so they never end up in a packaged game.
1. The toolbar button and the options menu#
Watch this part (0:04)Video 0:04

The button and its small arrow, outlined here, sit in the level editor toolbar.
- The button places the current tool. Its icon shows which tool that is, and it changes colour while you’re placing.
- The small arrow opens the options menu.
- Ctrl Alt M does the same as the button. To use a different key, go to Editor Preferences > Keyboard Shortcuts > Snap Measure Toolkit.
What’s in the options menu#
 1
2
3
4
5
- Header. Shows what the menu is editing. Its two buttons are Pin, which keeps the menu open, and Undock, which turns it into a tab.
- Tool. The list of tools, with the Tool Presets at the bottom.
- Style Actions. Saved looks you can reuse. See section 6.
- The current tool’s options. Line, Label and Extension, and anything only that tool has, such as the marker of a Mark. You only see what the tool uses.
- Configure. Display, Snapping & Behaviour, and the default settings.
Check the header. “Editing 1 Measure” means your changes go to the selected tool. A blank header means you’re setting the defaults for the next tools you place.
2. Placing a measure#
Watch this part (0:32)Video 0:32
- Click the toolbar button, or press Ctrl Alt M. A help line at the top left of the viewport shows the next step and the keys you can use.
- Move the mouse over your scene. A small marker shows where the point will land.
- Click to place point A.
- Move to the second spot and click to place point B. You can also press at A, drag, and release at B.
- The finished measure is selected, ready to edit. Press Esc at any time to cancel a half-placed tool.

The help line, at the top left of the viewport.

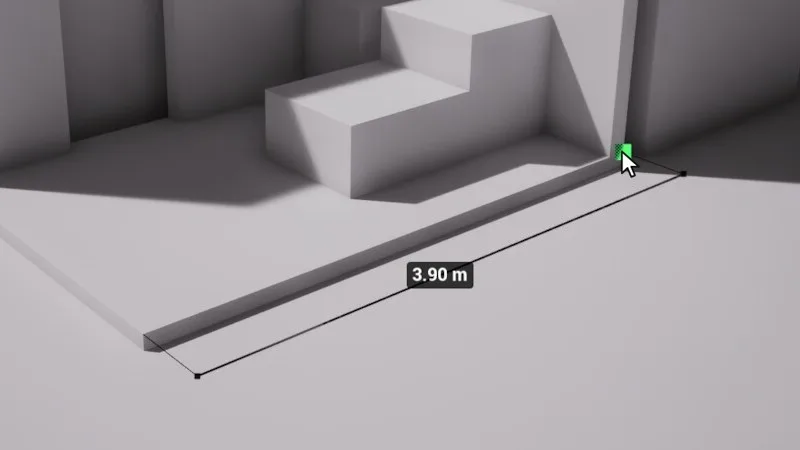
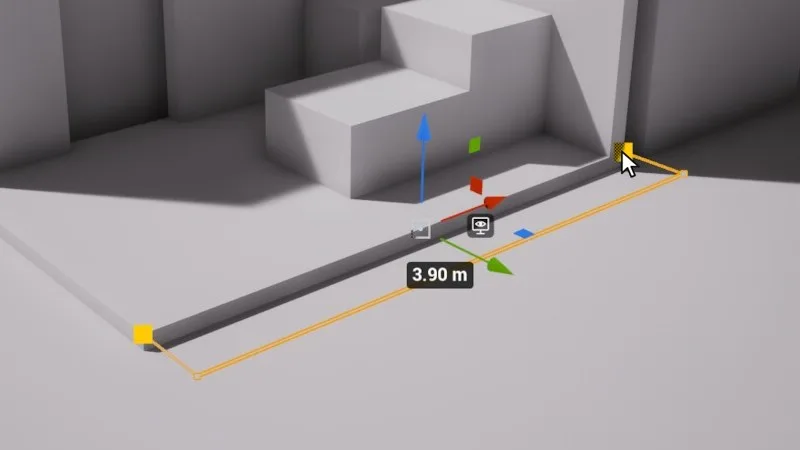
Each new tool is one undo step. It gets a numbered name such as “Measure 1” and goes into its own folder in the Outliner.
Snapping#
Each point snaps to the closest useful thing under the cursor. It tries a vertex first, then an edge midpoint, then an edge, then the surface. The marker’s colour tells you what it found.


Hold a key while placing to change how it snaps:
- Ctrl: The nearest vertex only.
- Shift: Lock to a world axis (X, Y or Z) through point A. The Angle tool snaps its arms to the Angle Increment instead.
- Alt: No snapping at all.
The snap radius, and which kinds of snap are on, are under Configure > Snapping & Behaviour. Skeletal meshes, landscapes, spline meshes, BSP and meshes over 2 million triangles only snap to their surface.
Measure options worth knowing#
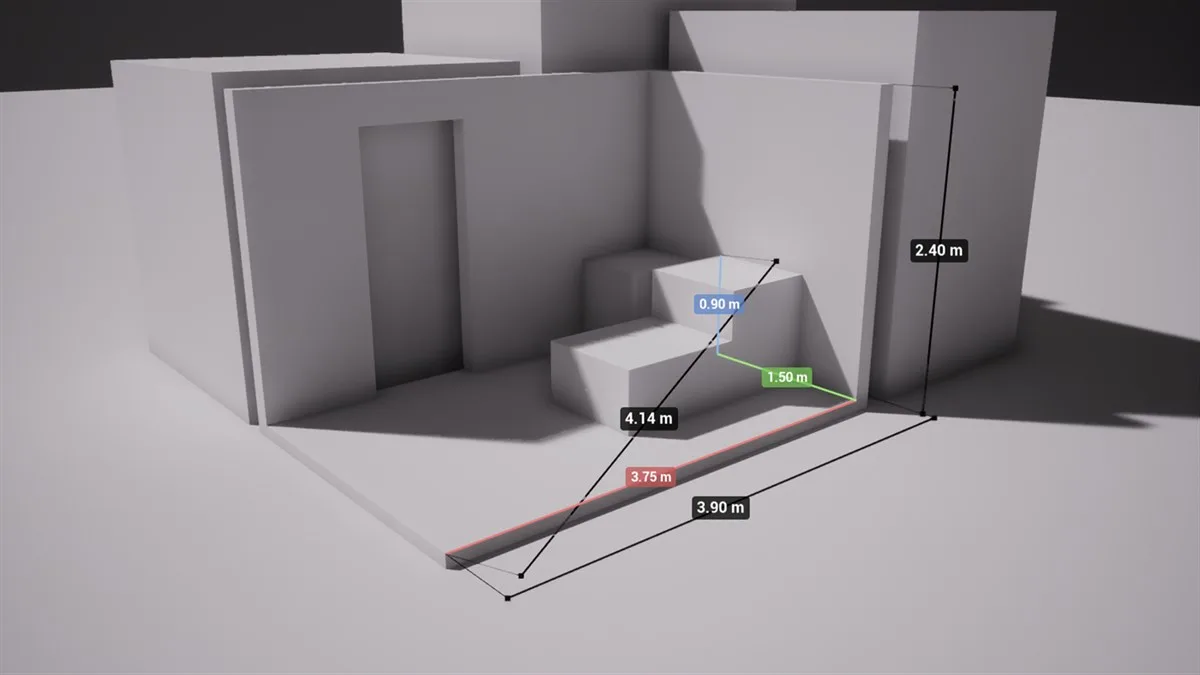
- Extension Offset moves the line away from what it measures, with extension lines back to the points, like an architectural dimension. The menu offers −200 to 200 cm; any value works in Details.
- Split Axis adds the X, Y and Z legs of the distance.
- Ruler Ticks draws gradations along the line.
- Endpoint Shape: None, Point, Circle, Arrow or Tick.
- Each end can attach to an actor, a socket or a bone, so the measure follows it.
3. The other tools#
Watch this part (1:01)Video 1:01
Pick a tool from Tool in the options menu, then click in the viewport. The help line always shows the next step. While placing, the number keys switch tool; each tool below shows its key.
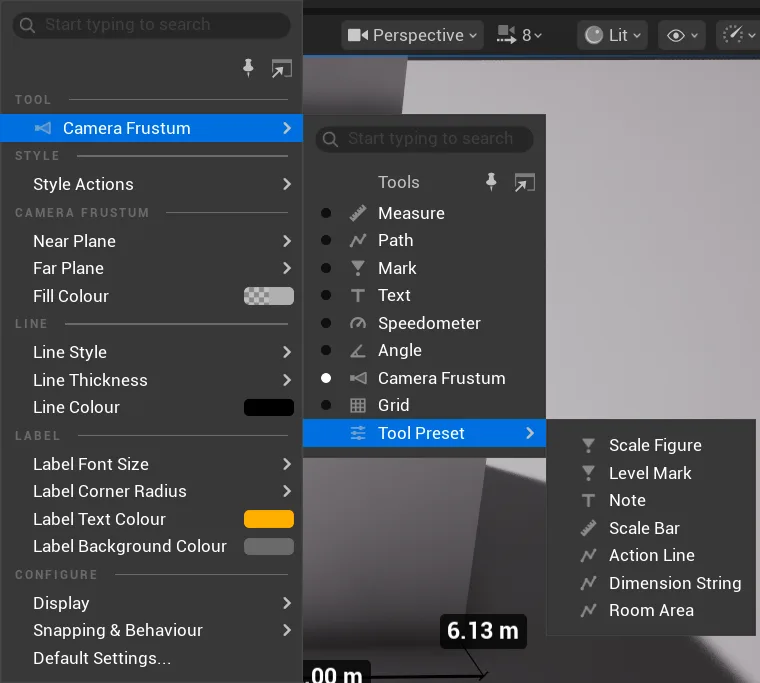
The Tool list, with Tool Preset open beside it.
2 Path#
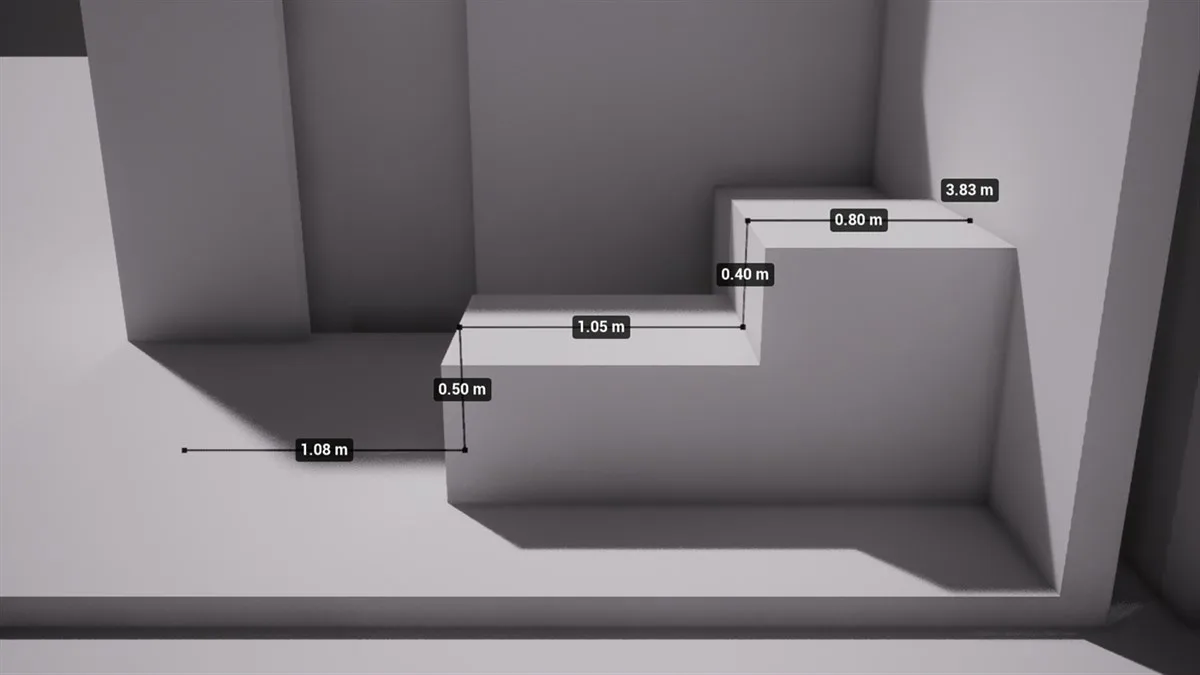
A length along many points, or an area when closed. Click point after point, then press Enter or double-click to finish. With three points or more, clicking the first point again closes the shape.
- Show Total Label and Show Segments Label: the full length, each segment’s length, or both.
- Closed makes a shape with a fill and an area label.
- Endpoint Shape applies to every point: Arrow makes a route, Tick a dimension string.
- From Actor follows a spline actor live. For any other moving actor, Bake Trajectory draws the path it takes in Sequencer.

3 Mark#
A marker with a label, usually a height. Move the cursor and click to place it.
- Marker: Arrow, Dot, Square, Cross, Person or None. Person is a 1.8 m silhouette, always real size, handy for scale.
- Label Content: height above world zero (the default), the X, Y or Z location, or your own text.
- World Space lays the marker flat and turns it with the actor (Details only).

4 Text#
A text label in the world. Move the cursor and click to place it, then type in Text in the Details panel. Shift Enter starts a new line.
- Show Reading Of (under Attach in Details) adds another tool’s reading after your text and keeps the text with that tool.
- Tokens such as {Frame}, {Lens} or {Reading:Tool Name} fill in live values.
- The colours make a note stand out: the Note preset gives a yellow box.
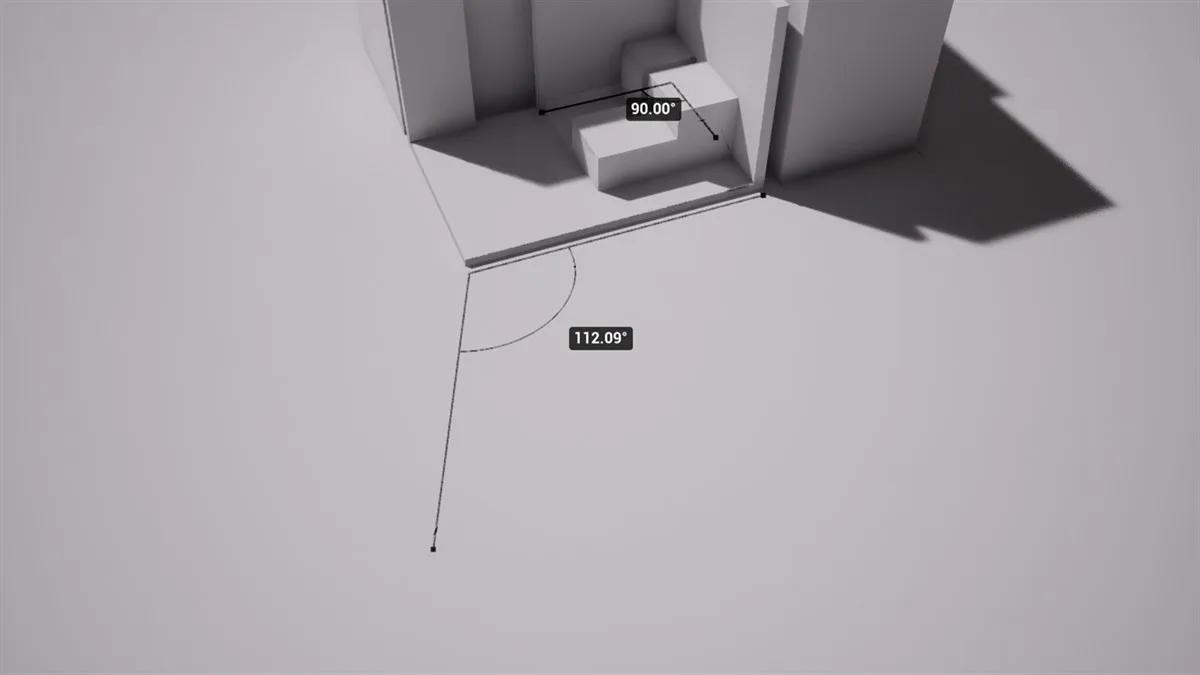
6 Angle#
The angle between two arms. Press at the corner, drag along the first arm and release, then click the end of the second arm.
- Angle Increment (Off, 1, 5, 10, 30 or 45 degrees) snaps the arms and draws ticks on the arc.
- Arc Radius sets the arc’s size; 0 picks it for you (Details only).
- Fill Colour shades the arc.
- Each arm end can attach to its own actor, so the angle follows a moving arm or door.

8 Grid#
A measured grid. Press at one corner, drag the first side and release, then move out and click for the second side. Drag any of the four corner handles to resize two sides at once.
- Units comes first, and the sizes and spacings in Details use it.
- Spacing X and Y (default 1 m) and Major Line Every (default 5) set the lines.
- Show Numbers writes whole numbers along two sides.
- Size: Min and Max on each axis, from the grid’s pivot, always in whole spacings.
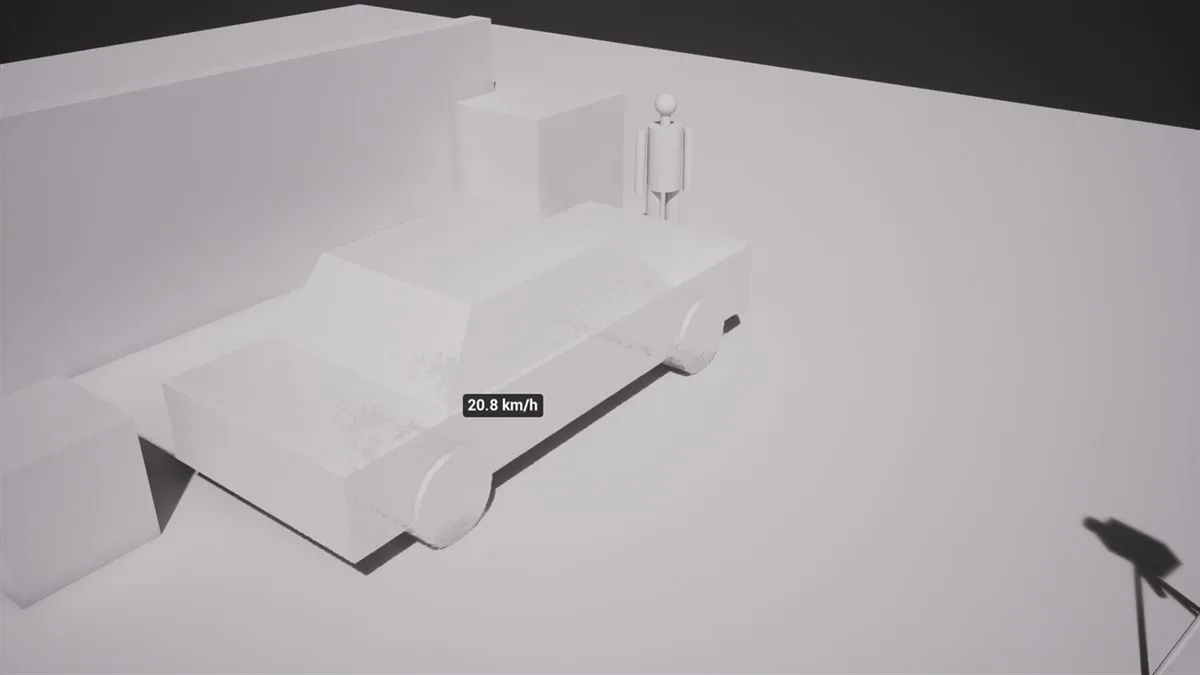
5 Speedometer#
The speed of a moving actor, on a label that rides with it. Select the actor first and pick the tool: it attaches at once. Or pick the tool and click the actor. Alt + click places it without attaching.
- Reading: Speed, Distance Travelled, Peak Speed, Average Speed, Acceleration or Angular Speed.
- Speed Units: cm/s, m/s, km/h (the default), ft/s, mph or kn (knots).
- Smoothing evens out the reading (0 to 5 s, default 0.25 s).
- Horizontal Only ignores up and down movement. Relative To subtracts another actor’s motion.
- While you scrub Sequencer the reading is approximate. Bake Speed samples every frame, so scrubbing, Play and renders show exact values.
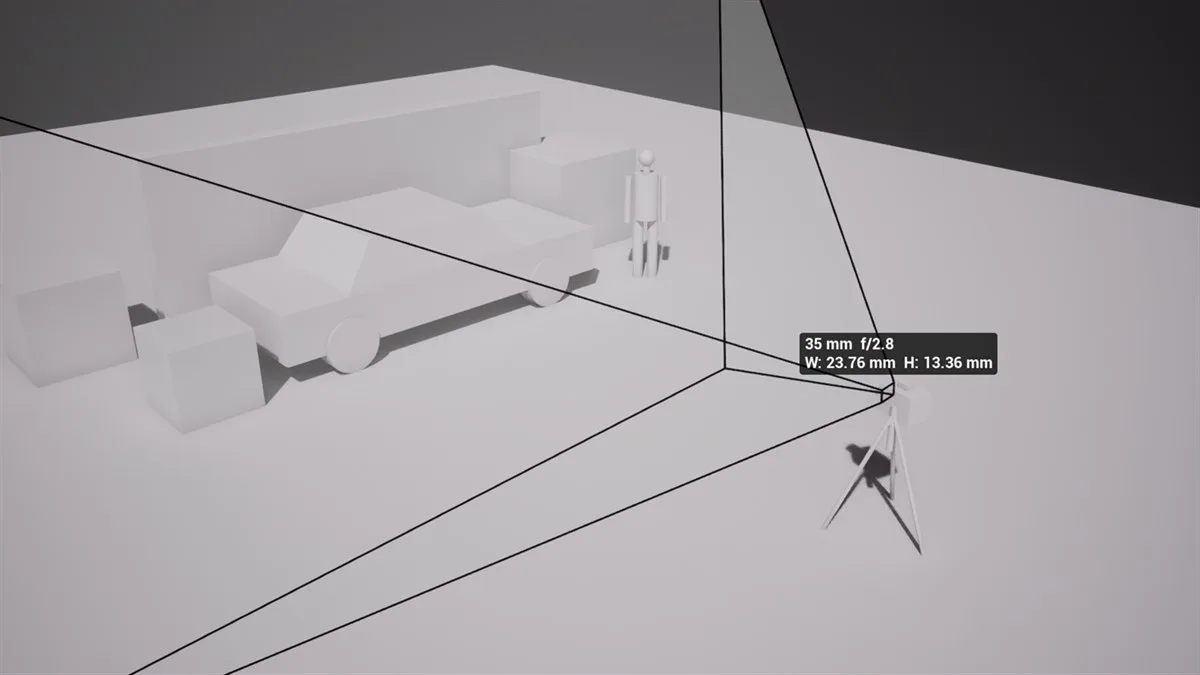
7 Camera Frustum#
What a camera sees, drawn as a pyramid in the scene. Select a camera first and pick the tool, or point at a camera and click. Cameras have no collision, so selecting first is the sure way. The frustum follows the camera, and reads its field of view and aspect ratio every frame.
- Near Plane and Far Plane set where the pyramid starts and ends (default 10 cm and 10 m).
- Fill Colour shades its four sides.
- Label (cine cameras only, off by default) shows the lens and sensor, such as “35 mm f/2.8”.
Tool Presets#
A preset sets up a tool for a common job, for the next placement only. Find them at the bottom of the Tool list, under Tool Preset. They keep your own colours and sizes, except Note, which brings its yellow box.
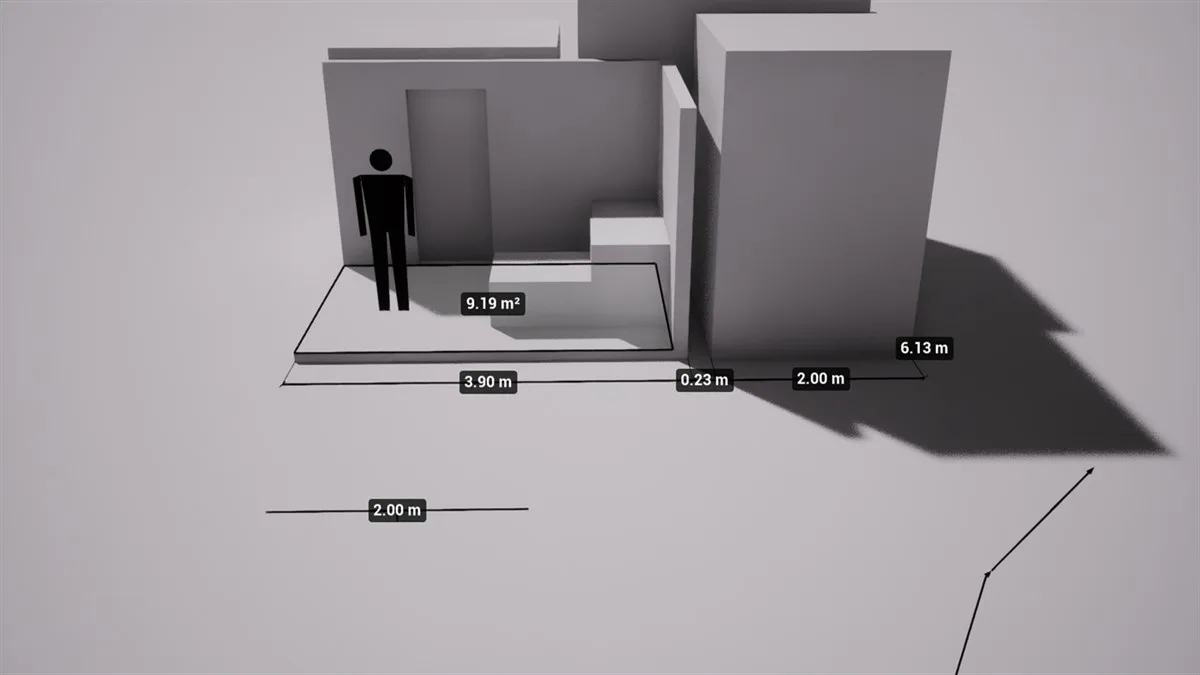
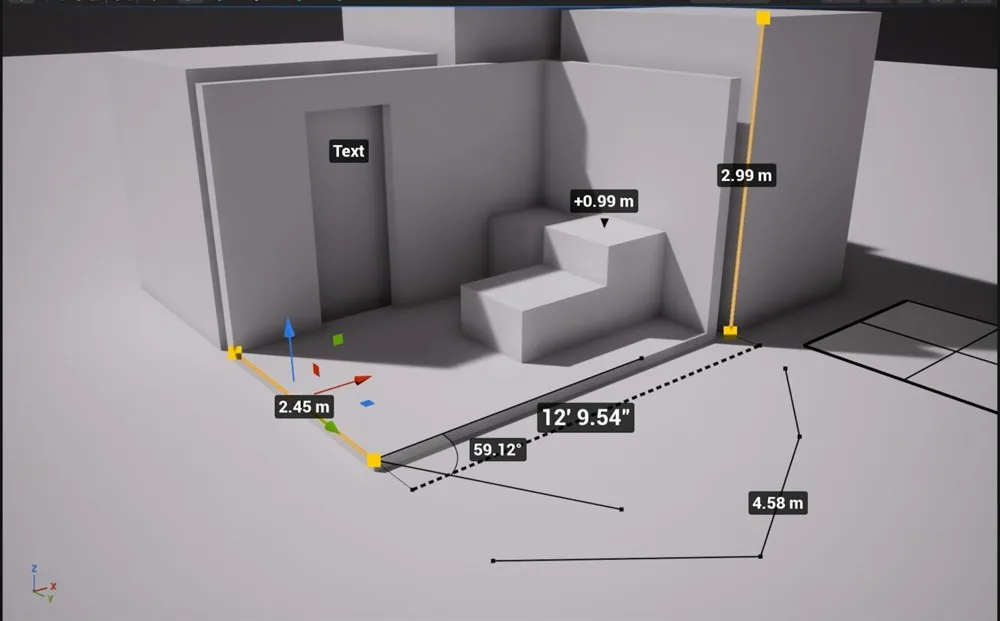
Presets in use: a Scale Figure, a Room Area, a Dimension String along the front, a Scale Bar on the floor and an Action Line at the bottom right.
| Preset | Tool | What you get |
|---|---|---|
| Scale Figure | Mark | A 1.8 m person, no label |
| Level Mark | Mark | An arrow with its height above world zero |
| Note | Text | A yellow box reading “Note” |
| Scale Bar | Measure | A ruler with ticks and no end markers |
| Action Line | Path | Arrows at every point, no labels |
| Dimension String | Path | A chain of dimensions 50 cm out, with ticks, each segment and the total |
| Room Area | Path | A closed shape with a fill and its area |
4. Selecting and editing a tool#
Watch this part (2:21)Video 2:21
Click a tool to select it. The Camera Frustum and the Speedometer have no handles, so click the tool itself. There are three places to work.
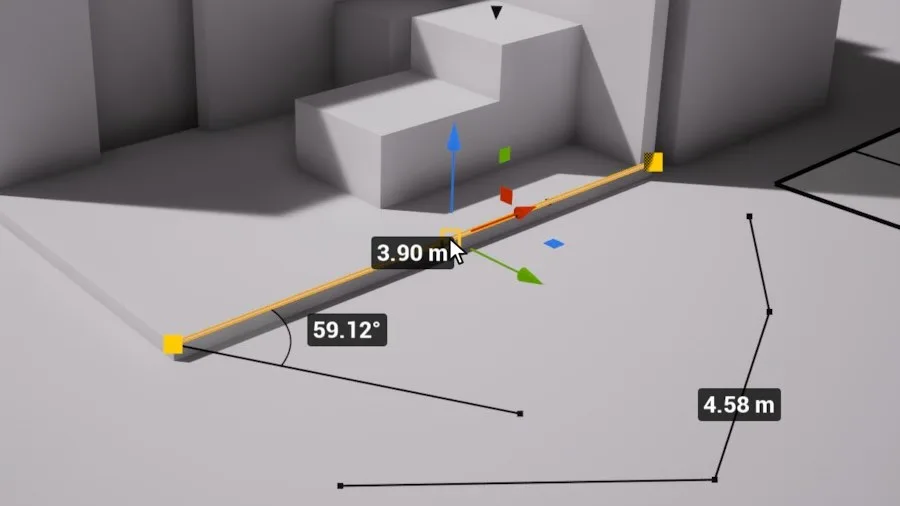
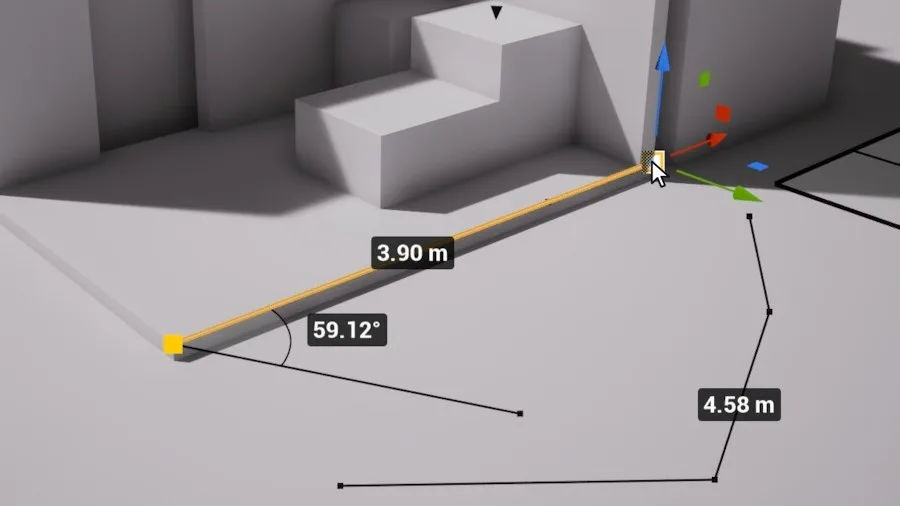
- Handles are the orange points on a tool’s ends or corners. If you’d rather a point follow the mouse until your next click, set Configure > Snapping & Behaviour > Handle Click to Follow Cursor.
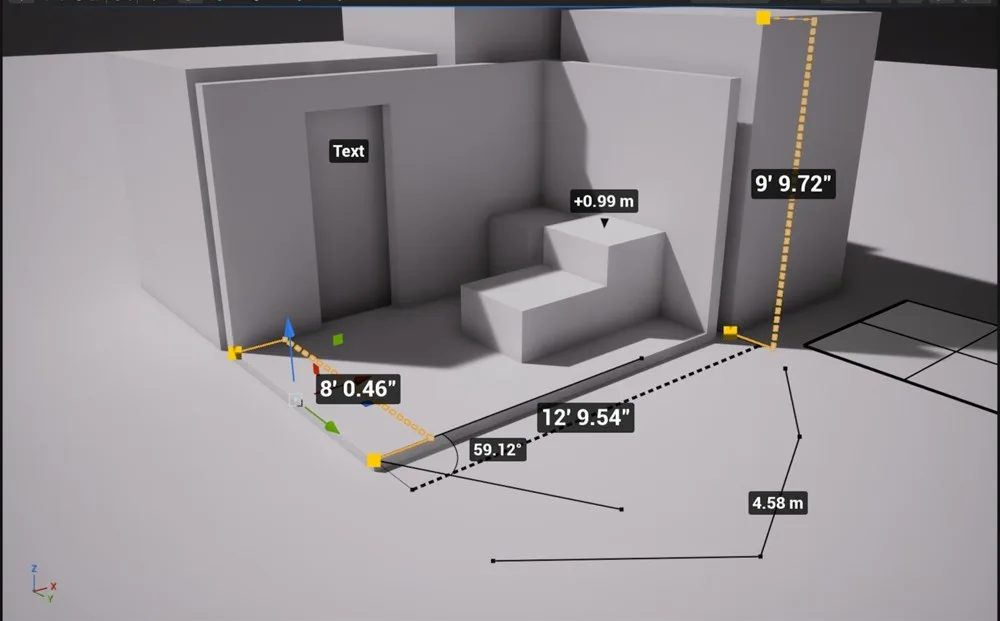
- The options menu now edits the selected tools, and its header reads “Editing 1 Measure”. Each change is one undo step.
- The Details panel has every value, grouped into sections such as Line, Label, Extension, Attach and Points. Most values can be keyed in Sequencer.
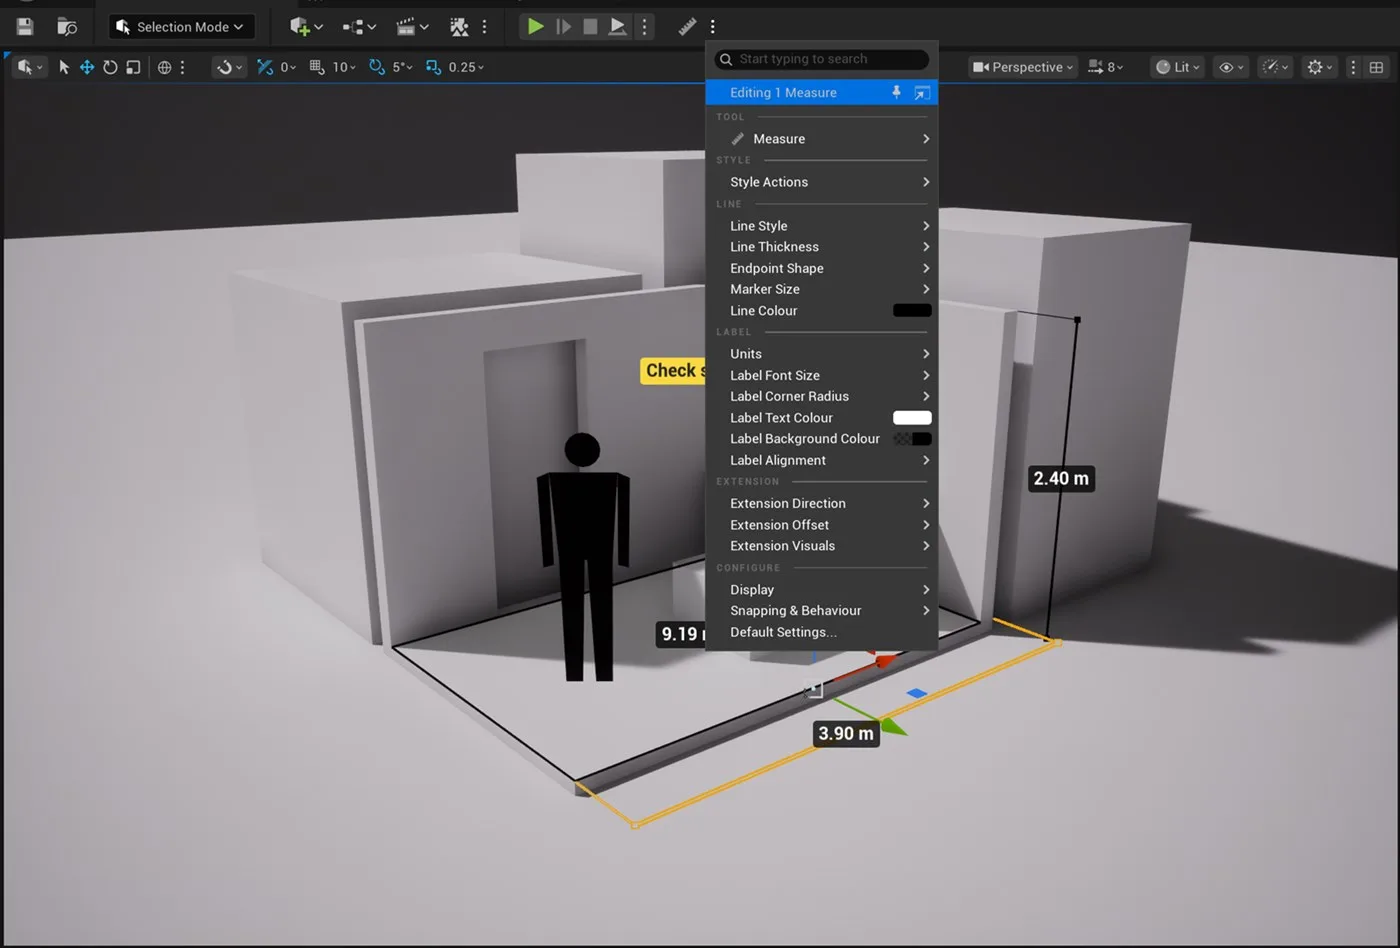
A selected measure: handles and gizmo in the viewport, and “Editing 1 Measure” at the top of the options menu.
Right-click a handle for Move Point with Cursor, Attach and Detach, Copy Reading, and on a path Insert Point After and Delete Point. Delete a tool with the Delete key, and rename it with F2 in the Outliner.
5. Changing the style#
Watch this part (2:42)Video 2:42

Select a tool and open the options menu. Each pick applies at once and the menu stays open, so you can try values and watch the result. Each change is one undo step.
With nothing selected, the same menu sets the defaults for the next tools you place.
- Line: Style (solid, dashed, dotted), thickness, colour, Endpoint Shape, Marker Size. Size Mode is under Configure > Display: Screen keeps the same width on screen; World sizes it in centimetres.
- Label: Units (mm, cm, m, km, in, ft, yd, ft-in), font size, corner radius, colours, and Alignment: Screen keeps it upright; Along Line follows the line. Text and decimals are in Details.
- Extension: Direction, offset and visuals, on a Measure or a Path.
- Fill: A colour for closed shapes. Alpha 0 means no fill.
The same measure, one change at a time#

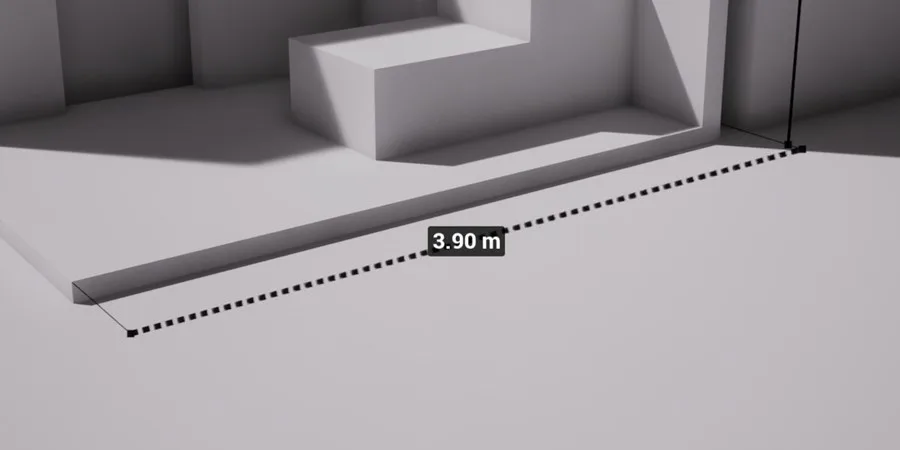


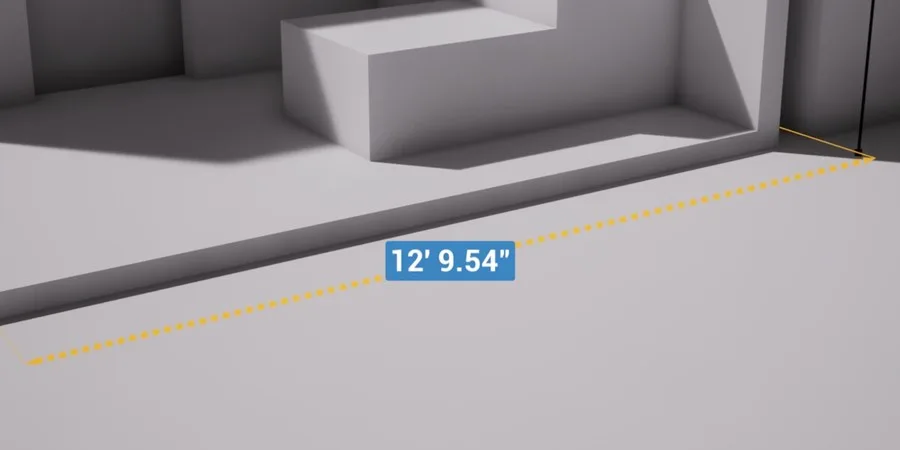
Always on Top draws the tool over the scene, and Show in Renders puts it in Play and Movie Render Queue renders. In the menu, both are under Configure > Display.
6. Style Actions#
Watch this part (3:08)Video 3:08
A style is a look: line, label, colours, fill, extension and each tool’s own options. Style Actions copy a look from one tool to others, and save it by name.

- Select the tool with the look you like and choose Copy Style from Selected. That look is now your default for new tools.
- Select other tools and choose Apply Style to Selected.
- Save Style As… stores the current look under a name. Delete Style removes one.
- Active Style picks a saved style. With tools selected it restyles them; with nothing selected it becomes the look for new tools. It reads “(modified)” once you change a value.
A style doesn’t hold the label text, decimals, dash lengths or whether a path is closed.
Sharing with your team#
- Saved styles live in
Config/DefaultSnapToolkit.ini, shown in Project Settings > Plugins > Snap Measure Toolkit Style Settings. Submit it to source control and everyone gets the same list. - Share Style (with nothing selected) makes your current look the team’s starting look, in
Config/DefaultEditorPerProjectUserSettings.ini. Teammates get it after they sync and restart, except values they changed themselves. Reset to Shared Style drops your own changes. - The label font for the whole project is on the same Style Settings page. It must be a Runtime font.
7. Display Badges#
Watch this part (3:30)Video 3:30
Each viewport and each camera can show a different set of tools. Display Badges are the quick way to choose: a small button above each tool’s label, right in the viewport.

- Turn them on with Configure > Display > Display Badges. The Display Manager has the same button at its top.
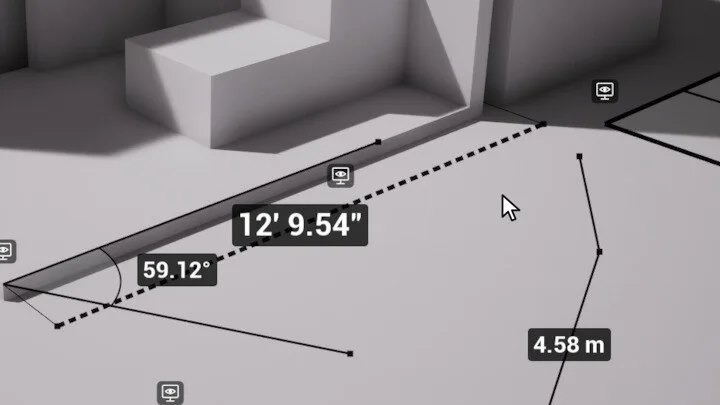
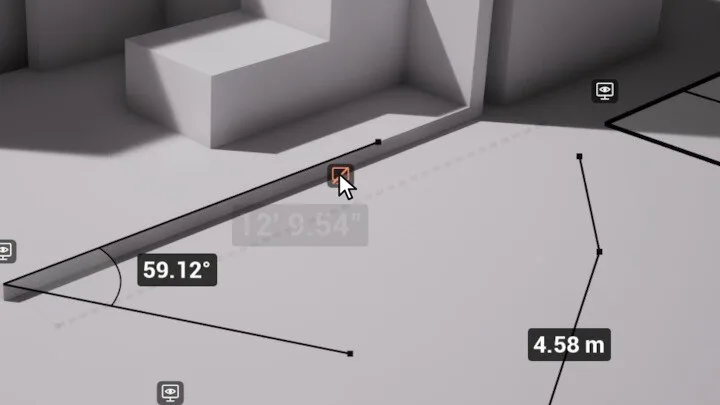
- Click a badge. The tool stops rendering in this view, and turns see-through here so you can still find it.
- Click the badge again to bring the tool back.
Badges never appear in renders. They switch off again when you restart the editor; your choices stay.
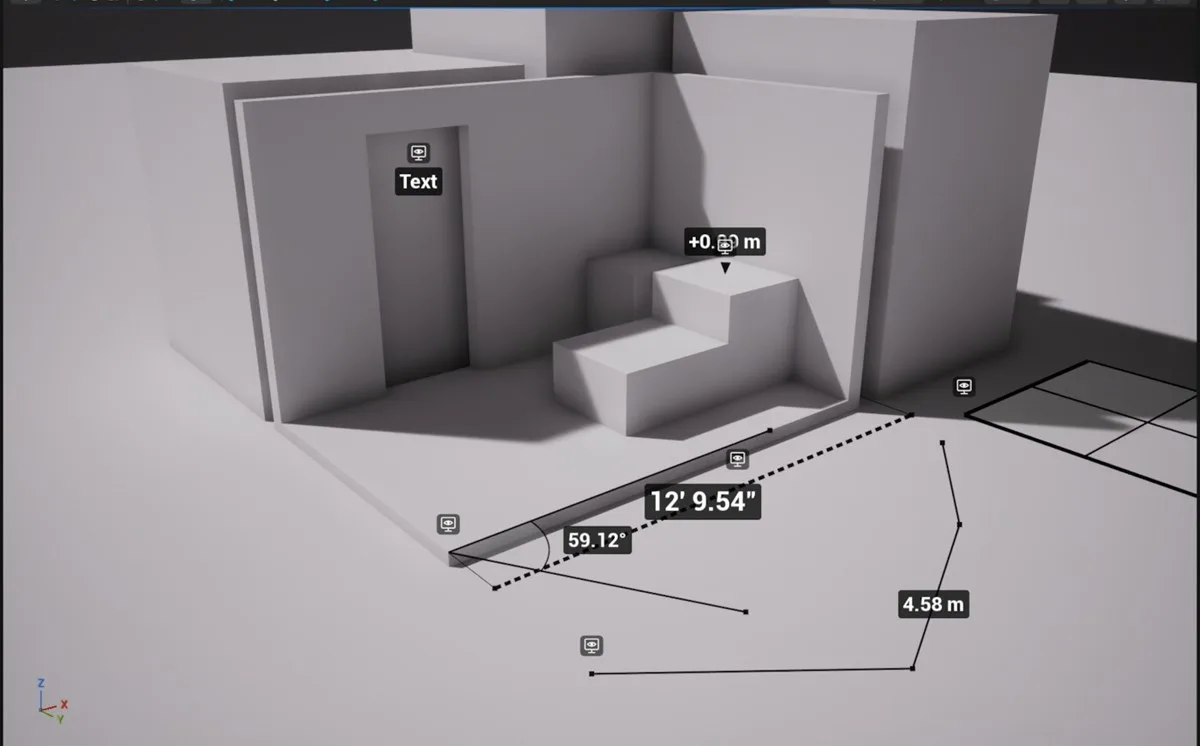
With Display Badges on, every tool in the viewport has its own small button.
8. The Display Manager#
Watch this part (3:51)Video 3:51
One table for every tool and every view. Open it from Configure > Display > Display Manager. It lists every tool, by type or by Outliner folder, with its reading, and has a column for each camera and each open viewport.
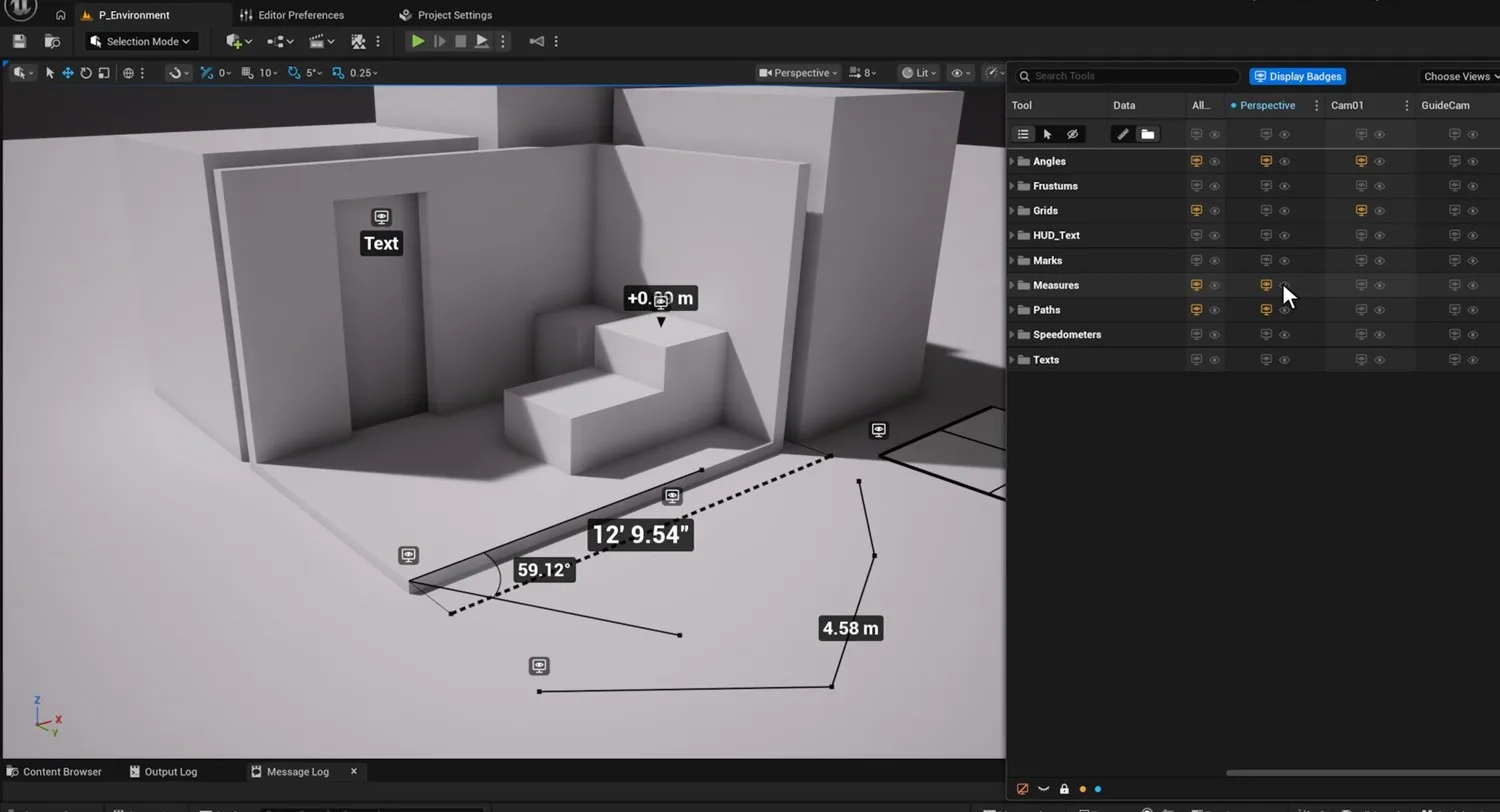
The Display Manager docked next to the viewport, so you see each change as you make it.
 1
2
3
4
5
6
7
- Display Badges turns the viewport badges on and off.
- Choose Views picks which cameras get a column.
- A column per view. A camera’s choices are saved on the camera, so they travel with the level and apply to renders through that camera. A viewport’s choices are yours alone.
- Monitor off: the tool stays visible in the editor but turns see-through, and is left out of that view’s renders (Play, Game View, Movie Render Queue).
- Eye off: the tool disappears from that view and from its renders.
- Red shows a monitor that is off. Orange on a row means only some of its tools are off.
- A type or folder row applies to every tool in it, including tools you add later.


Right-click selected tools in the viewport for the same choices: Hide in This View, Don’t Render in This View, Only These in This View, and Show All in This View.
Keys and mouse#
| When | Key or mouse | What it does |
|---|---|---|
| Any time | Ctrl Alt M | Start placing the current tool |
| Placing | Click | Place a point |
| Placing | Press, drag, release | Place two points in one go |
| Placing | Hold Ctrl | Snap to the nearest vertex only |
| Placing | Hold Shift | Lock to a world axis through point A (not on the Angle tool) |
| Placing | Hold Alt | No snapping (Speedometer and Camera Frustum: place without attaching) |
| Placing | 1 to 8 | Switch tool: 1 Measure, 2 Path, 3 Mark, 4 Text, 5 Speedometer, 6 Angle, 7 Camera Frustum, 8 Grid |
| Placing a path | Enter or double-click | Finish the path |
| Placing a path | Click the first point | Close the path into a shape (3 points or more) |
| Placing | Esc | Cancel |
| Editing | Click a handle | Select that point; the move gizmo jumps to it |
| Editing | Right-click a handle | The point’s menu |
| Editing | Alt + drag a path point | Add a point and drag it |
| Editing | Alt + drag a measure end | Move it without snapping (when Snap While Dragging is on) |
| Editing | F2 | Rename (Outliner or Display Manager) |
The Place Measure, Place Path and other per-tool commands have no keys by default. Give them keys in Editor Preferences > Keyboard Shortcuts > Snap Measure Toolkit.
Following moving things#
- Attach: A tool can follow an actor, a socket or a bone. Use Details > Attach, right-click a handle (each end of a measure attaches on its own), or right-click the actor.
- Add Tool: Right-click any actor and look in the Snap Measure Toolkit section. It creates tools already attached: Speedometer, Camera Frustum, Measure Between Selected (two actors), Dimensions of Selected (width, depth and height), Camera Info, Path From Spline and Focus Distance.
- Sequencer: Most tool values can be keyed. Add the tool to a sequence and key it like any actor, from colours and thickness to grid size.
- Bake: Bake Speed on a Speedometer, and Bake Trajectory on a Path whose From Actor moves, sample the sequence open in Sequencer once per frame. Right-click the actor and choose Bake Motion to bake everything following it at once. After a bake, scrubbing, Play and renders all show exact values. Changing the sequence marks a bake “(stale)”, with a Rebake button in Details.
- Show Progress: On a baked path, colours the part already travelled and the part still ahead.
- Tokens: Fill in live values in any label text: {Frame}, {Timecode}, {Shot}, {Lens}, {Aperture}, {Focus}, {FOV}, {Pan}, {Tilt}, {Roll}, {Speed}, {Height} and {Reading:Tool Name}.
Play and renders#
Tools with Show in Renders on (the default) appear in Play, Simulate, Game View and Movie Render Queue renders, labels included. There’s nothing to set up in Movie Render Queue.
- Turn Show in Renders off on a tool, or for new tools in Configure > Display, to keep it in the editor only.
- Use the Display Manager to leave tools out of particular cameras’ renders.
- Quick Render from the current viewport uses that viewport’s Display Manager choices.
- Tools are editor-only actors, so they never appear in a packaged game.
Keeping the menus open#
The options menu closes when the mouse leaves it. Two buttons in its header keep it open.
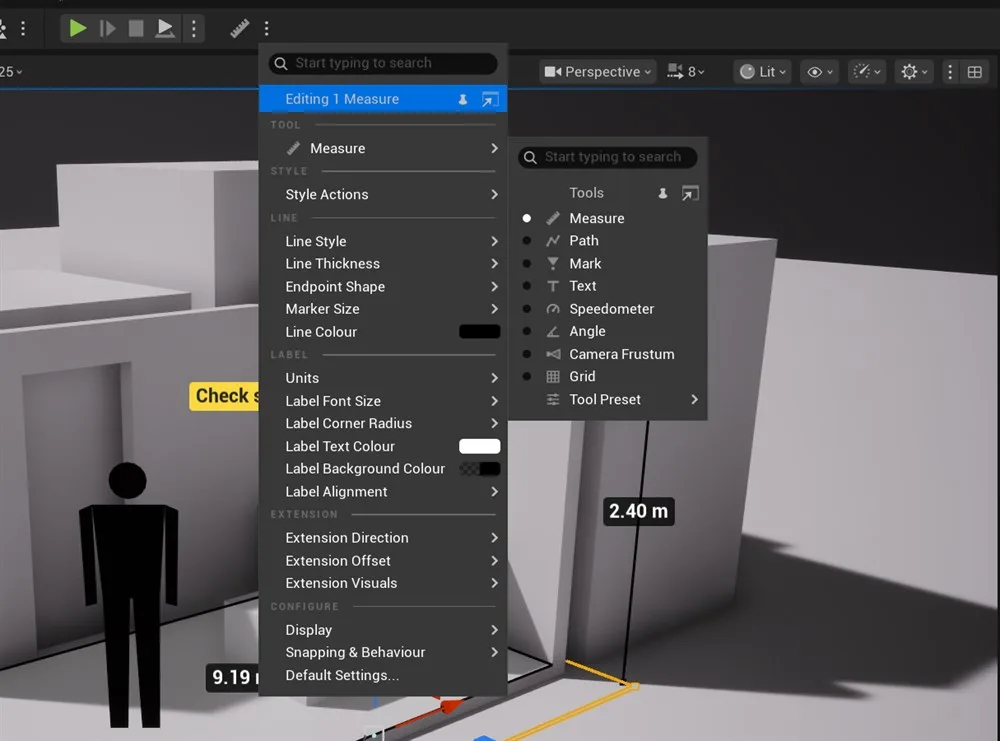
- Pin keeps the menu open right where it is, even when you click elsewhere. Click the pin again to close it.
- Undock turns it into a normal tab that you can dock anywhere. The tab comes back with your editor layout.
- The Tools list has the same two buttons. Pinning the Tools list pins the options menu too. The options then follow the tool you pick and the tools you select.
- Pins aren’t remembered after a restart; undocked tabs are.
Plugin settings#
| Where | Page | What it holds |
|---|---|---|
| Editor Preferences > Plugins | Snap Measure Toolkit Default Settings | Your defaults for new tools, plus snapping and behaviour. Saved per user. |
| Project Settings > Plugins | Snap Measure Toolkit Style Settings | Saved styles and the label font. Shared through Config/DefaultSnapToolkit.ini. |
Those marked “Menu” below are also in the options menu under Configure > Snapping & Behaviour, some with a shorter name. The rest are only on the Default Settings page.

| Setting | Default | Where | What it does |
|---|---|---|---|
| Snap Radius | 20 px | Menu | How close the cursor must be to snap |
| Snap to Edges, Edge Midpoints | On | Menu | Snap along edges and to their middles |
| Snap to Editor Grid | On | Menu | Points in empty space land on the editor grid |
| Snap While Dragging | Off | Menu | Snap when you drag a measure end with the gizmo |
| Handle Click | Select with Gizmo | Menu | Or Follow Cursor: the point follows the mouse until the next click |
| After Placing | Exit and Select It | Menu | Or Keep Placing, or Exit |
| Actor Pivot At | Center | Menu | Where a new measure’s pivot goes: its centre or point A |
| Feature Edge Angle Degrees | 20° | Page | Only edges sharper than this count as edges |
| Max Snap Triangles | 2,000,000 | Page | Bigger meshes snap to their surface only |
| Ignore Volumes | On | Page | Volumes never catch a snap |
| Show Toolbar Label | On | Page | Shows “Snap Measure Toolkit” next to the toolbar button |
Every option by tool#
The options menu shows only what the current tool uses. The Details panel has everything, grouped the same way.

| Group | Options | Tools |
|---|---|---|
| Line | Line Style, Dash Length and Gap, Size Mode, Line Thickness, Endpoint Shape, Marker Size, Line Colour, Always on Top, Show in Renders | All with lines |
| Label | Show Label, Text, Units, Decimals, Label Font Size, Label Corner Radius, Label Alignment, Label Text Colour, Label Background Colour | All |
| Extension | Extension Direction, Extension Offset, Extension Visuals (style, thickness, gap, overshoot) | Measure, Path |
| Fill | Fill Colour (alpha 0 = no fill) | Path (closed), Angle, Camera Frustum, Grid |
| Measure | Split Axis, Ruler Ticks, Actor Pivot At, Attach per end | Measure |
| Path | Show Total Label, Show Segments Label, Show Area Label, Closed, From Actor, Bake Trajectory, Show Progress | Path |
| Mark | Marker, Label Content, World Space | Mark |
| Text | Text, Show Reading Of | Text |
| Speedometer | Reading, Speed Units, Smoothing, Horizontal Only, Relative To, Bake Speed | Speedometer |
| Angle | Angle Increment, Arc Radius, Attach per arm | Angle |
| Camera Frustum | Near Plane, Far Plane | Camera Frustum |
| Grid | Units, Spacing X and Y, Size, Major Line Every, Show Numbers | Grid |
- In the options menu, Size Mode, Always on Top and Show in Renders sit under Configure > Display.
- Units: mm, cm, m, km, in, ft, yd and ft-in. Values are stored in centimetres whatever you show.
- To copy a reading, right-click a tool or one of its handles and choose Copy Reading. It works for every tool that shows a reading. A Text has no reading of its own, and a Camera Frustum’s reading is a cine camera’s lens.
- From Blueprint or Python you can read tools with GetReadingText, GetReadingValue, GetToolType, GetAllToolsInWorld and GetToolsOfType.
Troubleshooting#
A point snaps to the surface instead of a corner.
Skeletal meshes, landscapes, spline meshes, BSP and meshes over 2 million triangles only snap to their surface. The first time you hover a large mesh, its edges may take a moment to prepare.
I can’t find the toolbar button.
A full toolbar hides buttons behind its » overflow arrow. Turning off Show Toolbar Label makes the button narrower.
Ctrl+Alt+M does nothing.
If Snap Measure is also enabled, that key stays with Snap Measure. Set a key for Snap Measure Toolkit in Editor Preferences > Keyboard Shortcuts.
The menu closes while I work.
It closes when the mouse leaves it. Pin it.
The speed jumps around while scrubbing.
Scrubbing gives an approximate reading. Use Bake Speed.
A bake won’t run.
Open the sequence in Sequencer first. Bakes don’t run during Play or Simulate, and stop at 100,000 frames.
Focus Distance reads 0.
Set the camera’s Focus Method to Manual or Tracking.
Clicking a camera doesn’t attach the frustum.
Cameras have no collision. Select the camera first, then pick the tool.
A tool is missing from Play or a render.
Check Show in Renders on the tool, and its monitor icon in the Display Manager.
A label draws over another tool’s line in a render.
Labels in renders sit in front of other tools’ lines. Move the label or the view.
My pinned menu is gone after a restart.
Pins aren’t saved. Undock the menu into a tab to keep it.
Next to Snap Measure 1.0.0#
Snap Measure Toolkit is a separate plugin, so you can enable both in one project.
- Each plugin has its own toolbar button, settings pages and saved styles.
- Ctrl Alt M stays with Snap Measure. Give the toolkit its own key in Editor Preferences > Keyboard Shortcuts > Snap Measure Toolkit.
- Measures made with Snap Measure stay Snap Measure measures. The toolkit doesn’t convert them.
Support and version#
- Version: Snap Measure Toolkit 1.0.0 for Unreal Engine 5.8, Windows
- Made by: SIRSTUDIO
- Support: [email protected]. Please include your engine version and, if you can, a screenshot.
- For the curious: The console command
stat SnapToolkitshows what the tools cost each frame, andSnapToolkit.SmoothLabels 0gives labels hard edges.