SIRSTUDIO · Snap Measure documentation · sirstudiotools.com
Documentation / Snap Measure
Snap Measure documentation
Overview#
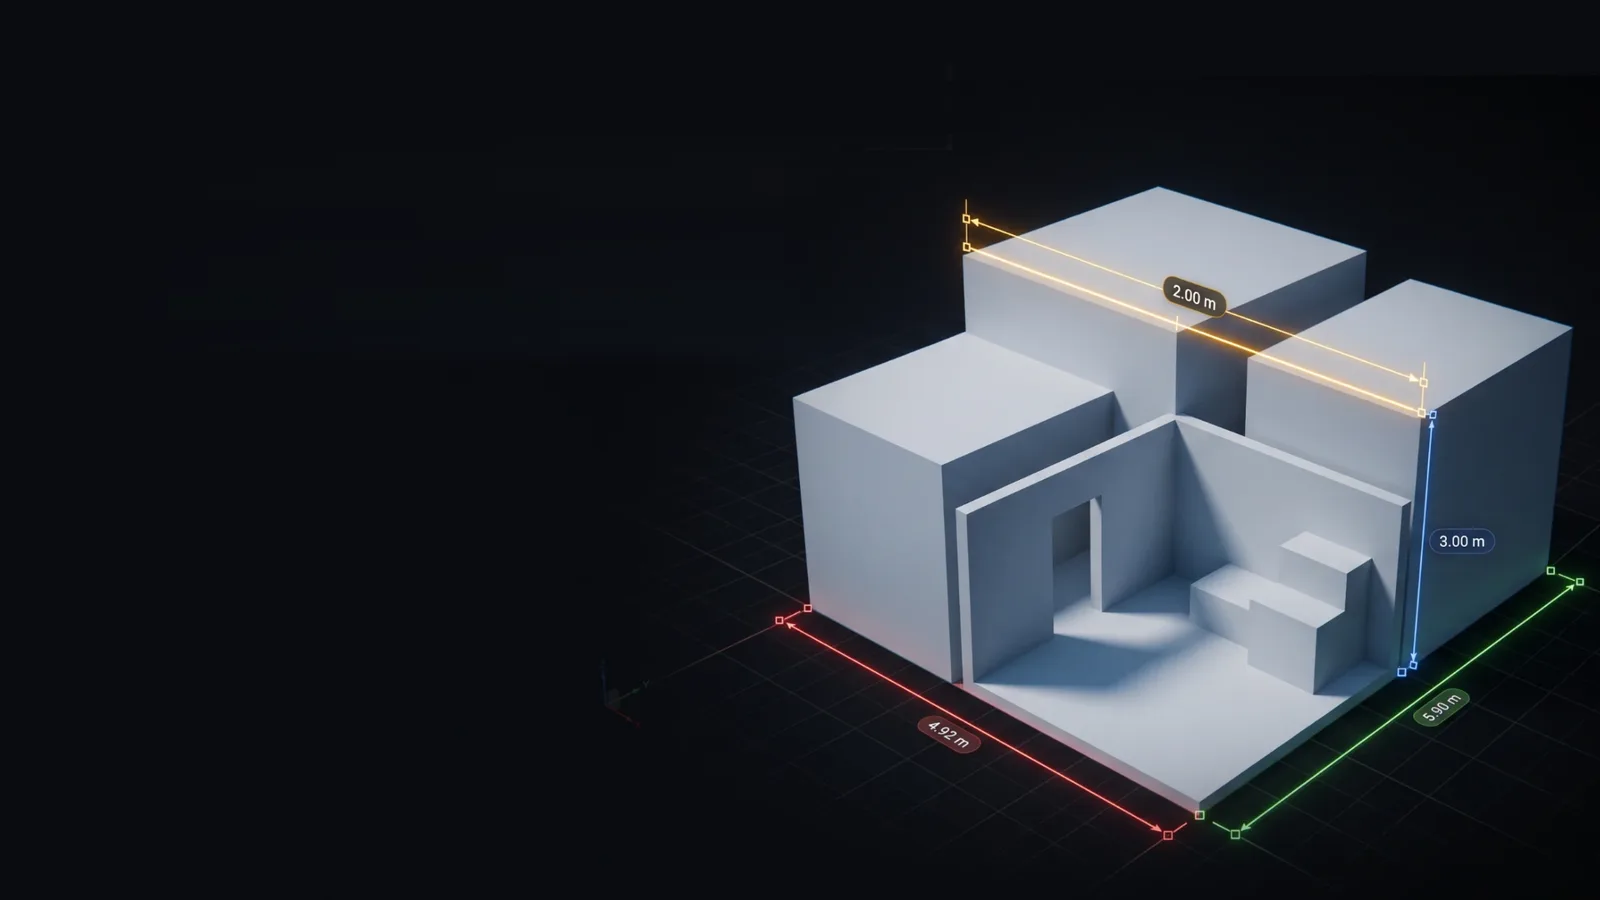
Snap Measure measures distances in the Unreal Editor viewport: click two points (or click and drag) and get a snapped measure with a live label. Measures are real actors: you can select, move, undo, attach them to animated actors, animate them in Sequencer and show them in Movie Render Queue renders. Their colours stay exact on screen and in renders, whatever the scene’s exposure.
| Requirement | Value |
|---|---|
| Engine | Unreal Engine 5.8 |
| Platform | Windows (Win64) editor |
| Content | Code only, no assets |
| Packaged games | Measures are never cooked into a packaged game |
To enable it: Edit > Plugins, search for Snap Measure, tick Enabled and restart the editor. A Measure button with a small options arrow appears in the level editor toolbar.
Placing measures#
Start the tool with the Measure toolbar button or Ctrl+Alt+M, then place point A and point B in either way:
- Two clicks: click A, move the mouse (B follows as a live preview), click B.
- Click and drag: press at A, drag, release at B.
The point under the cursor snaps automatically. The marker colour shows what it snapped to.
| Marker | Snapped to |
|---|---|
| Green | Vertex |
| Magenta | Edge midpoint |
| Cyan | Nearest point on an edge |
| Yellow | An end point of another measure |
| Orange | Surface |
| White | Empty space, not on the grid (Alt held, Snap to Grid off, or on a plane facing the view) |
| Light blue | Empty space, snapped to the editor grid (Snap to Grid) |
| Key | While placing |
|---|---|
| Ctrl | Always snap to the nearest vertex |
| Shift | Lock point B to the world X, Y or Z axis through A (guide line in the axis colour). A point that snaps to geometry or to another measure’s end point is projected onto that axis, so you can copy its height or length. Shift+Alt keeps the lock but stays free (no snapping, no grid) |
| Alt | No snapping (free point); Alt+click places a free point, Alt+drag still orbits |
| Esc | Cancel |
- Only real (visible) mesh edges snap, not the diagonals inside flat faces. Static meshes, instanced meshes, foliage and Nanite meshes snap to vertices and edges; other geometry snaps to its surface.
- End points of other measures snap too (yellow marker), so you can chain measures end to end along a wall. Hidden measures are skipped.
- With Snap to Grid on (the default), points in empty space land on the grid and snap to the editor’s grid size: in perspective, point A goes on the world grid plane (Z = 0) and point B on the level plane through A, so floor measures stay flat; in ortho views, on the view plane. Hold Alt for a free point on the plane. With it off, points in empty space are free, and in perspective a first point needs a surface.
- Each new measure is named Measure 1, Measure 2 and so on (one above the highest number already in the level) and goes into a Measures folder in the Outliner. Measures dragged in from Place Actors are named and filed the same way.
- After placing, the editor returns to Selection mode and selects the new measure (both can be changed in the options menu > Configure > Snapping & Behaviour).
Editing measures#
Select a measure by clicking its line or its label; its two end points then show as orange handles.
- Move the whole measure: use the normal move, rotate and scale gizmo on the measure.
- Move one end point: click its handle. The move gizmo jumps to that point; drag any axis or plane. Each drag is one undo step.
- Follow cursor instead: set Edit Endpoint Mode to Follow Cursor (options menu > Configure > Snapping & Behaviour). Clicking a handle then makes the point follow the cursor with full snapping and Ctrl / Shift / Alt; click to drop it, Esc to cancel.
- Right-click a handle: Move Point with Cursor, Move Point with Gizmo, Attach Point to the selected actor, Detach Point, Copy Distance.
- Type exact values: Details > Points > Point A / Point B (positions relative to the measure). Distance (cm) below them shows the current length (read only).
Copy Distance. Right-click a measure (its line, label or a handle) and choose Copy Distance to copy its length to the clipboard in the measure’s own units and decimals, for example “2.85 m”. A notification confirms what was copied. With several measures selected, the viewport’s right-click menu copies one line per measure: its name, a tab and its distance, ready to paste into a spreadsheet.
Everything is undoable, and Delete removes a measure like any other actor. Copy, paste and duplicate keep the measure’s look.
Measure settings#
Each measure owns its settings (Details panel, sections Line, Label, Extension, Attach, Points). New measures copy them from the project defaults when they are created; changing a default later does not change existing measures.
| Section | Setting | What it does |
|---|---|---|
| Line | Line Pivot | Measure pivot at the line centre or at point A |
| Line | Line Style | Solid, Dashed or Dotted (Dash Length and Gap appear when they apply) |
| Line | Size Mode | Screen: sizes in pixels, constant at any distance. World: sizes in cm |
| Line | Line Thickness | Pixels or cm (Size Mode) |
| Line | Endpoint Shape | None, Point, Circle, Arrow (points outwards), Tick (45° architectural mark) |
| Line | Endpoint Size | Pixels or cm (Size Mode) |
| Line | Line Colour | Colour; alpha = opacity |
| Line | Split Axis | Also draws the X / Y / Z parts in the world axis colours, each with its own length label |
| Line | Show Gradations | Ruler marks from point A, evenly spaced along the line like a real ruler in the scene, starting on the line and running to one side (towards the measured points on dimension lines). One mark per unit of the selected Units (mm in mm, m in m; ft-in: inches with longer marks every foot), longer marks every 10 and a middle mark at 5. The spacing is chosen for the whole line from how big it looks on screen: zooming out shows every 5th, then every 10th mark. In perspective, marks get smaller and closer with distance |
| Line | Always on Top | On: line, shapes and labels are never hidden by geometry. Off: hidden behind objects |
| Line | Show in Renders | Also shows the measure in Play and in Movie Render Queue / Sequencer renders |
| Label | Show Label | Hides the label of this measure |
| Label | Prefix | Text before the distance, e.g. “Height: “ |
| Label | Units | mm, cm, m, km, in, ft, yd, ft-in |
| Label | Decimals | 0 to 6 |
| Label | Label Font Size | Font points, constant on screen |
| Label | Label Corner Radius | Rounded background corners, pixels (0 = square) |
| Label | Label Alignment | Horizontal on screen, or along the line (never upside down) |
| Label | Label Text / Background Colour | Colours; background alpha = opacity |
| Extension | Extension Direction | Horizontal (floor plans) or Vertical (elevations). Vertical measures use the measure’s Y axis: rotate it around Z to aim |
| Extension | Extension Style | Solid, Dashed or Dotted extension lines (dash length and gap from the Line section) |
| Extension | Extension Offset | Architectural dimension: draws the line this far (cm) beside the measured points, joined by extension lines. 0 = off, negative = other side |
| Extension | Extension Thickness | Extension line thickness, pixels or cm (Size Mode) |
| Extension | Extension Gap / Overshoot | Gap at the object, and how far extension lines run past the line |
Every Line, Label, Extension and Points setting can also be animated in Sequencer (see Animating measures in Sequencer).
Defaults and the options menu#
The defaults for new measures live in Project Settings > Plugins > SnapMeasure, in the same sections as a measure’s Details (Line, Label, Extension), plus Styles (the saved named styles), Snapping and Behaviour. They are saved to the project’s Config/DefaultEditor.ini, so the whole team shares them.
The small arrow next to the Measure button opens a quick menu. It stays open while you change values and closes by itself once the mouse leaves it.
Style (top of the menu): the Modify Style for Selected toggle and a Style Actions submenu with two groups, Selected Measures and Saved Styles:
- Modify Style for Selected: a toggle. While it is on (highlighted, with “ON” next to it, and the Measure toolbar icon turns orange), every value you change in the menu is also applied straight away to the selected measures, one value at a time, so their other values are kept. Each change is one undo step; a colour picker drag is a single one. Changes are still saved as the defaults for new measures. Click it again to turn it off.
- Selected Measures > Copy Style from Selected: sets the menu’s Line, Label and Extension values (including Label Alignment and Extension Direction) from the selected measure (they are also saved as the defaults for new measures). Select exactly one measure; otherwise a message tells you to. Greyed out when no measure is selected.
- Selected Measures > Apply Style to Selected: gives the selected measures the Line, Label and Extension values shown in the menu (one undo step). Their other settings, such as prefix, decimals and attachments, are kept. Greyed out when no measure is selected.
- Saved Styles > Save Style As…: asks for a name and stores the menu’s style values under it. An existing name is replaced. Saved styles live in the project config, so the team shares them; they are also listed in Project Settings > Plugins > SnapMeasure > Styles.
- Saved Styles > Load Style: sets the menu’s values from a saved style picked from the list (the list reads “No saved styles” while there are none). With Modify Style for Selected on, it also restyles the selected measures.
- Saved Styles > Delete Style: removes a saved style picked from the list.
Extension Offset and sides. With Modify Style for Selected and exactly one measure selected, the value is applied as it is (negative = other side). With several measures selected, and with Apply Style or Load Style, each measure keeps its side and only the offset distance changes: with the menu at 60 cm, a measure at −40 becomes −60 and one at +25 becomes +60, so dimensions on both sides of a plan restyle without flipping. A measure with no offset (0) takes the menu value as it is. To move a measure to the other side, type a negative or positive value in its Details.
The rest of the menu:
- Line: Pivot, Line Style, Line Thickness, Endpoint Shape, Endpoint Size, Line Colour.
- Label: Units, Label Font Size, Label Corner Radius, Label Text Colour, Label Background Colour, Label Alignment.
- Extension: Extension Direction, Extension Style, Extension Offset, Extension Thickness, Extension Gap, Extension Overshoot. Extension Offset offers -100, -50, -25, Off, 25, 50 and 100 cm; any other value goes in Details.
- Configure: Snapping & Behaviour (Snapping: Snap to Edges, Snap to Edge Midpoints, Snap While Dragging, Snap to Grid; Behaviour: Edit Endpoint Mode, Exit to Selection When Done, Select Measure When Done) and All Settings…, which opens Project Settings > Plugins > SnapMeasure. Snap Tolerance, Feature Edge Angle, Max Snap Triangles and Ignore Volumes are only there. The table below lists all of them.
| Snapping / Behaviour setting | Default | Effect |
|---|---|---|
| Snap Tolerance | 1.5° | How close (view angle) the cursor must be to a vertex, edge or measure end point |
| Snap to Edges / Edge Midpoints | On | Two toggles (Snap to Edges, Snap to Edge Midpoints): nearest point on an edge, and the middle of an edge |
| Feature Edge Angle | 20° | Which mesh edges count as real edges |
| Max Snap Triangles | 2,000,000 | Bigger meshes snap to the surface only |
| Ignore Volumes | On | Volumes are skipped when picking points |
| Snap While Dragging | Off | Gizmo drags of an end point snap to vertices and edges (Alt = free) |
| Snap to Grid | On | Empty-space points land on the grid (perspective too) and snap to the editor’s grid size, whether or not the viewport grid toggle is on |
| Edit Endpoint Mode | Select with Gizmo | What clicking an end point handle does: put the move gizmo on it, or make it Follow Cursor |
| Exit to Selection When Done | On | Off: keep placing measures until Esc |
| Select Measure When Done | On | Selects each new measure |
Attaching points to actors#
Each end point can follow an actor, also when it moves or is animated: in the editor, while scrubbing Sequencer, in Play and in renders.
- Select the measure and open Details > Attach > Point A (or Point B).
- Pick the actor in Attach To (actor picker or eyedropper). The actor may be in any level, including streamed sublevels and World Partition maps.
- Optional: pick a Socket / Bone from the drop-down (skeletal meshes list every bone; type to search). None = the actor’s pivot.
- The point jumps onto the pivot, socket or bone (Offset 0). Use Offset to move it from there, in the actor’s or socket’s local space.
Shortcut: Ctrl+click the target actor so it is selected with the measure, right-click a handle and choose Attach Point to it. Detach Point leaves the point where it is.
- An attached point’s handle shows a ring.
- Dragging an attached point slides it on its actor; it stays attached.
- If the actor can’t be found (its level isn’t loaded, or it was deleted), the point stays at its last position and its handle and line end turn red until the actor is back.
Animating measures in Sequencer#
Every setting in a measure’s Line, Label, Extension and Points sections can be keyed in a Level Sequence, so a measure can grow, change colour, fade in or switch units over time.
- Add the measure to a Level Sequence (drag it from the Outliner into Sequencer, or + Track > Actor To Sequencer).
- On the measure’s track click + and pick the property, e.g. Point B, Line Colour, Extension Offset or Show Label.
- Set keys as usual. The measure redraws on every frame, while scrubbing, in Play and in Movie Render Queue renders.
- Point A and Point B are positions relative to the measure, so you can also animate the measure actor’s own transform to move it as a whole.
- Animating a colour’s alpha fades the line or label in and out.
- Attachments (Details > Attach) are not keyable; an attached point already follows its animated actor.
- Turn on Show in Renders for measures that should appear in the final render. Labels of measures that are Sequencer spawnables show in renders too.
Renders and Play#
With Show in Renders on (the default), a measure also appears in Play / Simulate, in the editor’s Game View (G) and in Movie Render Queue and Sequencer renders, with its line, end shapes and labels. Turn it off for measures that are only for you while you work.
- Pixel sizes are set for a 1080p output. Taller outputs scale up, so a 4K render looks like the 1080p one.
- Always on Top works in renders too.
- Colours are exact in renders, unaffected by auto exposure.
- Measures are never cooked into a packaged game, whatever this setting says.
- In World Partition maps, save the level after changing Show in Renders so Play picks up the change.
Tips, limitations and troubleshooting#
| Situation | What to do |
|---|---|
| A point doesn’t snap to vertices on a mesh | Skeletal meshes, landscape, spline meshes, BSP and meshes above Max Snap Triangles snap to the surface only. The first hover over a large mesh prepares it in the background for a moment |
| A new measure starts on another measure instead of the surface behind it | It snapped to that measure’s end point (yellow marker). Hold Alt for a free point, or move the cursor a little further away |
| The measure button is greyed out | Measures are placed in the editor world: stop Play / Simulate first |
| A measure doesn’t show in Play or renders | Check Show in Renders; in World Partition maps save the level once after changing it |
| A label hides behind objects | Always on Top is off for that measure |
| An end point is red | Its attached actor isn’t loaded or was deleted; load the level or detach the point |
| Measures look different after changing defaults | They don’t: defaults only apply to new measures. Use Style Actions > Apply Style to Selected, or turn on Modify Style for Selected and change the values |
| The Measure toolbar icon is orange | Modify Style for Selected is on: menu changes also restyle the selected measures. Turn it off in the options menu |
- Hotkey: Ctrl+Alt+M; rebind it in Editor Preferences > Keyboard Shortcuts (search “Measure”).
- The first time measures are drawn in an editor session their material compiles once (they may look grey for a moment).
- Windows (Win64) only. Measures are editor annotations and never ship in a packaged game.
- Support: [email protected]